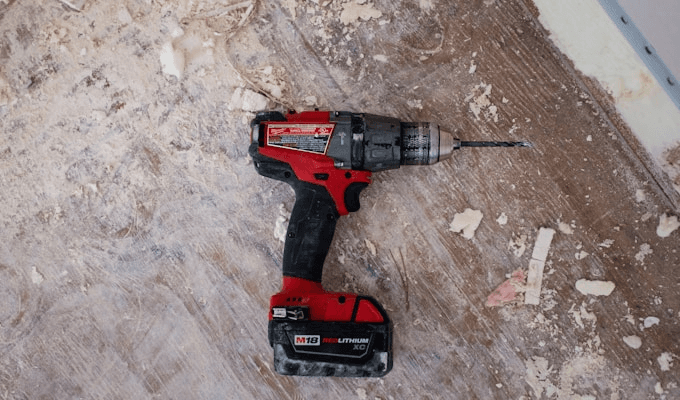
Drill Bit Types and When to Use Each One
Walking into the drill bit aisle can be overwhelming. There are dozens of styles, coatings, and materials -- all designed for specific jobs. Over the years in my shop I've wrecked enough bits by using the wrong type on the wrong material to know that this selection decision matters more than most people realize. This guide cuts through the confusion so you always grab the right bit.
HSS Twist Bits -- The All-Rounder
Best for: Metal, wood, plastic
High-speed steel twist bits are the most common and versatile. The spiral flutes carry chips out of the hole as you drill. Standard HSS handles soft metals like aluminum and mild steel, plus wood and plastic. The twist geometry is self-centering to a degree, though for precise work in metal you'll still want to start with a center punch. HSS bits are available in fractional, number, and letter sizes covering virtually any diameter you'd need.
Proper technique: For metal, start slow (under 300 RPM for steel, 500-1000 RPM for aluminum) and apply consistent forward pressure. Let the bit cut -- don't force it. For wood, higher speeds (1000-2000 RPM) work well. Always withdraw the bit periodically on deep holes to clear chips and prevent binding.
Speed settings: High speed for softwood and plastic, medium for aluminum and cast iron, low for hardened steel and stainless. When in doubt, go slower -- you can always speed up, but an overheated bit loses its temper and won't sharpen back to full effectiveness.
What to avoid: Don't use uncoated HSS on stainless steel or hardened alloys -- the bit will overheat and dull within seconds. Don't use HSS twist bits on tile, stone, or glass; the geometry is wrong and you'll damage both the bit and the material.
- Black oxide coating: Reduces friction, good for general use
- Titanium coating (TiN): Harder, stays sharp longer, better for metal
- Cobalt (M35/M42): Not a coating but an alloy -- handles stainless steel and hardened metals
Brad-Point Bits -- Clean Holes in Wood
Best for: Wood, plywood, some plastics
The sharp center point positions the bit exactly where you want it, and the spurs on the outside rim score the wood before the flutes cut. Result: clean, splinter-free holes. Essential for furniture-making, cabinetry, and any visible woodwork. The difference in hole quality between a brad-point and a standard twist bit in wood is dramatic -- the brad-point produces a sharp, defined entry point and clean walls, while a twist bit wanders slightly and leaves a rougher, sometimes torn edge.
Proper technique: Mark your hole location with a pencil rather than a punch (the center point self-positions on the mark). Start at medium speed (800-1200 RPM) and apply steady forward pressure. Slow down as you near the back face of the board to minimize breakthrough tear-out. For critical holes, back up the workpiece with scrap wood -- the bit exits into the scrap rather than tearing the good face.
Speed settings: Medium-high for softwood, medium for hardwood. Brad-point bits don't work well at very low speeds -- they need enough RPM for the spurs to score cleanly rather than just dragging.
What to avoid: Never use brad-point bits on metal or masonry -- the center point is too delicate and will break immediately. Don't use them on particle board or MDF for production work -- the abrasive resins in these materials dull brad-point bits faster than solid wood.
Masonry Bits -- Concrete, Brick, and Stone
Best for: Concrete, brick, block, stone, tile
Identifiable by their wide, arrow-shaped carbide tips. Must be used with a hammer drill for concrete and brick. The hammering action cracks the material while the bit clears debris. The carbide tip is brazed onto a steel shank -- the carbide does the actual cutting work, while the steel body removes debris through the flutes. Without the hammer action, a masonry bit in rotation-only mode will eventually penetrate concrete but takes 10 times longer and burns through bits rapidly.
Proper technique: Use hammer drill mode for concrete and brick. For tile, switch to rotation-only mode -- hammer mode will crack tile. Start slowly to establish a starter dimple, then increase pressure. Periodically withdraw the bit to clear dust from the hole, especially in deep drilling. Keep the bit moving forward -- dwelling without advancing generates heat that can crack the carbide tip.
Speed settings: Medium speed with full hammer function for concrete. Low-medium speed in rotation-only for tile and soft stone. Most hammer drills have a dedicated masonry mode that adjusts the hammer rate for the material.
What to avoid: Never use on metal or wood -- the carbide geometry is designed for brittle fracture, not shearing, and won't cut either material effectively. Don't force a masonry bit that stops advancing -- this is usually rebar or a particularly hard aggregate. Try a fresh spot slightly to the side rather than burning through the bit.
Spade (Paddle) Bits -- Large Holes in Wood, Fast
Best for: Rough holes in wood for running pipes and wires
The flat, paddle-like shape bores large holes (up to 1-1/2") quickly. Holes aren't as clean as those from brad-point or Forstner bits, but they're fast and cheap. Great for electrical and plumbing rough-in work where the hole will be hidden by a wall plate anyway. The center point self-positions, and the flat cutting edges do the bulk material removal quickly and aggressively.
Proper technique: High torque, moderate speed (600-1000 RPM). Apply steady forward pressure -- spade bits work best with consistent feed. When drilling through 2x4s or thicker stock, drill from one side until the center point just pokes through, then flip and complete the hole from the other side. This dramatically reduces tear-out on the exit face.
Speed settings: Medium speed for clean entry, higher for rough-in work where speed matters more than appearance. Larger diameter spade bits (1 inch and up) should be run slower to prevent the bit from grabbing and twisting the drill violently.
What to avoid: Spade bits are not the right choice for any application where hole quality matters -- they leave rough edges and can cause significant tear-out. Don't use them in hardwood for visible applications. Never use in metal or masonry.
Step Bits -- Sheet Metal and Thin Materials
Best for: Sheet metal, electrical panels, thin plastic
The cone shape with graduated steps lets you drill multiple hole sizes with one bit. The stepped design won't grab and tear thin materials the way a standard twist bit can. Step bits are especially valuable in electrical panel work, HVAC ductwork, and conduit installation where you need clean holes in steel or aluminum sheet without a pilot hole.
Proper technique: Start at the center of the workpiece with light, steady pressure. Step bits are self-starting -- no punch needed. Use cutting fluid on the steps when drilling steel. Stop when the step you need is flush with the top surface. For precise hole sizing, mark the target step size with a marker before drilling so you know exactly when to stop.
Speed settings: Low to medium speed. Step bits in sheet metal generate heat quickly -- slower speeds and cutting oil keep temperatures manageable and extend bit life significantly.
What to avoid: Step bits are not designed for thick materials -- the steps are typically designed for sheet goods up to about 3/16 inch. In thicker material, the step geometry doesn't work properly and the bit cuts inaccurately. Don't use step bits in wood or masonry.
Hole Saws -- Large Diameter Holes
Best for: Doorknob holes, pipe penetrations, large openings
A hole saw is a cylindrical saw blade that attaches to a mandrel with a pilot bit in the center. Available in sizes from 3/4" to 6"+. Use at low speed with firm, steady pressure. The pilot bit guides the hole saw and starts the cut before the saw teeth engage. Hole saws are the right tool for lock sets, pipe penetrations through framing, and any application requiring a large, relatively clean circular opening.
Proper technique: Low speed (300-600 RPM) with consistent, firm pressure. Periodically withdraw the hole saw to clear the plugged debris -- a clogged hole saw overheats quickly. For through-cuts in thick material, drill from both sides using the pilot hole as a guide. Use a dedicated arbor for each hole saw size, or an adjustable arbor with the correct diameter adapter.
Speed settings: Low and consistent. Hole saws in wood can run a bit faster; in metal they need slow speeds and cutting oil or they overheat and strip the teeth rapidly.
What to avoid: Don't run hole saws fast -- the large diameter means even moderate RPM creates very high surface speeds at the teeth. High speed = overheating = tooth damage. Don't force a plugged hole saw; the plug needs to be cleared before continuing.
Forstner Bits -- Precision Large Holes in Wood
Best for: Flat-bottomed holes, overlapping holes, angled drilling in wood
Forstner bits cut the cleanest large holes in wood. They're slower than spade bits but produce smooth, flat-bottomed cavities -- ideal for concealed hinges, dowel joints, and decorative work. The rim-cutting design means they can drill overlapping holes and angled holes without wandering, making them essential for cabinetry and furniture work. Unlike spade bits, the cutting edge is on the outside rim, which is what enables the flat bottom and the ability to drill off-center or at an angle.
Proper technique: Low speed (400-800 RPM for most sizes), steady forward pressure. Mark your center carefully -- while Forstner bits don't wander, starting off-center produces an off-center hole. Back up your workpiece with scrap to get a clean exit. Use a drill press if possible for the cleanest results, though handheld drilling works fine for most applications.
Speed settings: Slow for larger diameters (1-1/2 inch and up), medium for smaller sizes. Forstner bits overheat quickly if run too fast -- the rim geometry generates significant heat.
What to avoid: Don't use Forstner bits on metal or masonry. Don't run them at high speed -- the large cutting surface area generates heat rapidly. Don't use cheap Forstner bits for hardwood; the steel quality matters significantly for these bits.
Quick Reference Chart
| Material | Best Bit Type | Speed |
|---|---|---|
| Softwood | Brad-point or HSS twist | High |
| Hardwood | Brad-point or Forstner | Medium |
| Mild steel | HSS twist (TiN coated) | Low-Medium |
| Stainless steel | Cobalt twist | Low |
| Concrete/Brick | Masonry (hammer drill) | Medium |
| Sheet metal | Step bit | Low-Medium |
| Tile/Glass | Diamond-tipped or carbide spear | Low (with water) |
Drill Bit Coatings and Materials Explained
The color and finish of a drill bit tells you a lot about its capabilities -- if you know what to look for. Here's what the different coatings and base materials actually mean for performance.
HSS vs Cobalt
Standard high-speed steel (HSS) is the baseline material for twist drill bits. It handles most common drilling tasks competently and is affordable enough to replace without much consideration. HSS retains its hardness up to about 600 degrees Fahrenheit -- when the bit turns blue from overheating, it has lost its temper and won't sharpen back to full hardness.
Cobalt bits (M35 grade = 5% cobalt, M42 grade = 8% cobalt) are not a coating -- cobalt is alloyed into the steel throughout the entire bit. This is an important distinction. When you resharpen a cobalt bit, the fresh cutting edge still has the same cobalt content as the original edge. Cobalt retains hardness at much higher temperatures (up to 1,000 degrees Fahrenheit), which makes it the right choice for stainless steel, hardened alloys, and any material that generates significant drilling heat. The downside: cobalt bits are more brittle than standard HSS, so they're more susceptible to breakage from lateral forces or aggressive pecking motions.
TiN vs TiCN vs TiAlN Coatings
Titanium Nitride (TiN) is the most common coating -- the familiar gold color on budget and mid-range bits. TiN reduces friction and increases surface hardness, extending bit life in metal drilling compared to uncoated HSS. It's a good general-purpose upgrade. The limitation: TiN coatings are thin and wear away over time. Once the coating is gone from the cutting edges, the bit performs like standard HSS. TiN bits are not sharpenable in a way that preserves the coating.
Titanium Carbonitride (TiCN) is harder and more wear-resistant than TiN, with a gray-violet color. TiCN handles harder materials and higher cutting speeds better. It's the coating to choose for production drilling in mild steel or aluminum where you need longer bit life between changes.
Titanium Aluminum Nitride (TiAlN) is the premium coating for demanding metal work. It actually gets harder at high temperatures (the opposite of most materials), which makes it ideal for high-speed drilling in tough alloys. TiAlN-coated bits run without cutting oil in many applications because the coating insulates the cutting edge from heat. They're more expensive but the right tool for serious metalworking applications.
Diamond Bits for Tile
For ceramic tile, porcelain, glass, and natural stone, diamond-tipped bits are the correct choice. The diamond particles embedded in the tip abrade through the material rather than cutting -- this is appropriate for brittle, hard materials that would crack or shatter under the cutting forces of a conventional drill bit. Diamond bits require water cooling during drilling to prevent overheating, which both damages the bit and causes thermal shock cracking in tile. A simple approach: tape a ring of plumber's putty around the drilling location and fill it with water, creating a small reservoir that keeps the bit cooled as you drill. Run at low speed (under 300 RPM) with light to moderate pressure. Let the bit abrade through the material -- forcing it causes cracking.
Building Your Starter Drill Bit Kit
If you're equipping a workshop from scratch or replacing a worn-out collection, here are the sizes and types that cover the vast majority of homeowner and DIY tasks without over-investing.
HSS Twist Bits (for metal and general use): A fractional index set from 1/16 inch to 1/2 inch covers nearly every situation. Focus quality spending on the sizes you use most: 1/8, 3/16, 1/4, 5/16, and 3/8 inch see the most use in typical home shop work. A decent set with TiN coating from a brand like Irwin, DeWalt, or Bosch runs $30-60 and will serve well for years with proper use.
Brad-Point Bits (for wood): A set covering 1/8 through 1/2 inch handles dowel work, shelf pin holes (typically 5mm = 13/64 inch), hinge pilot holes, and most furniture drilling tasks. Add a 3/4 inch and 1 inch brad-point for larger wood applications. Brad-point sets from Fisch or FAMAG are notably better quality than budget options.
Masonry Bits: For a homeowner, a set covering 3/16, 1/4, 5/16, and 3/8 inch handles most anchor installations and concrete fastening tasks. Add a 1/2 inch bit if you'll be mounting heavy items. SDS-Plus masonry bits are worth owning if you have an SDS drill; they transfer hammer energy more efficiently than round-shank bits in a standard drill chuck.
Specialty bits to add as needed: A set of spade bits from 3/8 to 1-1/2 inch, a 2-1/8 inch hole saw for door hardware, a step bit for sheet metal work, and a Forstner bit set (3/8 through 1 inch) for furniture and cabinetry work. You don't need all of these on day one -- add them when a specific project calls for them.
Step-by-Step: Drilling Clean Holes in Different Materials
Selecting the right bit is only half the equation. Technique matters equally. Here's how to get clean, accurate holes in the three most common material categories.
Drilling Clean Holes in Wood:
- Select a brad-point bit for clean holes in solid wood or plywood. Mark the center point clearly with a pencil or awl.
- Set drill speed to medium-high (1000-1500 RPM for most sizes up to 1/2 inch). Use the lower gear if your drill has two speed settings.
- Place the center point of the bit on your mark and start the drill before applying forward pressure. This allows the bit to spin up to speed before it engages the material.
- Apply steady forward pressure through the cut. Don't stop mid-hole if possible -- pausing and restarting often produces a slightly ragged hole.
- Back up the workpiece with scrap wood clamped against the exit face. This is the single most effective technique for preventing tear-out. The bit exits into the scrap, and the backing prevents the fibers from lifting as the bit breaks through.
- If backing isn't possible, drill until the center point just breaks through the back face, flip the workpiece, and complete the hole from the other side using the small pilot hole as a guide.
Drilling Clean Holes in Metal:
- Select the correct bit: TiN-coated HSS for mild steel and aluminum, cobalt for stainless and hardened alloys. Check that the bit is sharp -- a dull bit on metal is dangerous and damaging.
- Center-punch the drilling location. This is non-negotiable for metal work. Without a punch dimple, the bit will wander across the surface and produce an off-location hole.
- Set drill speed to low (200-400 RPM for steel, 500-1000 RPM for aluminum). Using high speed in metal overheats the bit and work-hardens the metal around the hole.
- Apply a drop of cutting oil to the drilling location. This cools and lubricates the bit and dramatically extends bit life. Purpose-made cutting oils like Tap Magic work well; even regular motor oil is better than nothing.
- Start drilling with steady, moderate pressure. The bit should produce small, curled chips from steel -- if it's producing fine powder or blue smoke, the speed is too high or the pressure too low.
- Peck drill (periodically withdraw the bit to clear chips) for holes deeper than 1/4 inch. Chip packing generates heat and can seize the bit in the hole.
Drilling Clean Holes in Concrete:
- Select a masonry bit sized for the anchor you're installing. Most concrete anchors require a bit diameter matching the anchor diameter.
- Mark the drilling location. Use a center punch or the tip of a nail to create a small starter dimple in the concrete surface.
- Set the drill to hammer drill mode. Rotation-only mode in concrete is extremely slow and produces excessive heat in the bit.
- Start drilling at low speed for the first 1/4 inch to establish the hole location without the bit skating across the surface.
- Increase to medium speed with full hammer function. Apply steady forward pressure -- let the hammer action do the work. Don't bear down excessively; this reduces the hammer stroke effectiveness.
- Withdraw the bit every 30-45 seconds on deeper holes to clear dust. Concrete dust is abrasive and packs tightly -- a packed hole stalls the drill and damages the bit. Use compressed air or blow into the hole to clear dust before reinserting the bit.
FAQ
Can I sharpen drill bits?
Yes. HSS twist bits can be sharpened with a bench grinder or a dedicated drill bit sharpener. Brad-point and masonry bits are harder to sharpen at home -- it's usually easier to replace them.
Do gold/black/silver colors mean anything?
Yes. Black bits have an oxide coating for general use. Gold/bronze bits are titanium-coated for longer life. Silver/plain bits are uncoated HSS. Cobalt bits are often a duller gold color.
How do I know when a bit is dull?
Signs include: needing excessive pressure, the bit generating heat instead of cutting, rough or oversized holes, and squealing sounds. A sharp bit should cut with moderate pressure.
When should I use cutting oil?
Use cutting oil any time you're drilling through metal thicker than about 1/8 inch, and always when drilling stainless steel or hardened alloys. For thin sheet metal, a single drop is sufficient. For deeper holes in thick steel, reapply oil every few seconds of drilling. Cutting oil serves three purposes: it lubricates the bit to reduce friction, it cools both the bit and workpiece to prevent heat buildup, and it helps chips clear the hole by reducing their tendency to weld to the bit surface. The improvement in bit life is substantial -- bits used with proper cutting oil typically last 3-5 times longer than those run dry.
Drill press vs handheld drill for precision holes -- when does it matter?
A drill press eliminates the single biggest source of inaccuracy in hand drilling: the slight wandering and off-angle that happens as you apply forward pressure with a handheld tool. For woodworking joints, cabinetry shelf pins, metal fabrication, and any application where hole location needs to be accurate to 1/32 inch or better, a drill press is worth the setup time. For general construction work, anchor installations, and rough-in drilling where 1/8-inch accuracy is sufficient, a handheld drill is perfectly adequate. If you don't own a drill press, a drill guide -- a metal jig that clamps to your workpiece and holds the bit perpendicular to the surface -- provides most of the accuracy benefit at a fraction of the cost.
How do I prevent breakout on the back side of a hole?
Breakout (tear-out on the exit face) is caused by the bit's cutting edge exiting through unsupported wood fibers. The most reliable prevention method is backing the workpiece with scrap wood clamped tightly to the exit face -- the bit exits into the scrap and the backing eliminates unsupported fibers. When clamping isn't practical, drill through until the center point just barely pokes through the back face, then flip the workpiece and complete the hole from the other side. In metal, deburring the entry and exit sides of the hole with a larger bit or a countersink removes the sharp burr that forms when the bit breaks through. For tile and brittle materials, starting with a smaller pilot hole and stepping up to the final size in multiple passes reduces the force at breakthrough and minimizes cracking.
For a versatile drill bit set that covers wood, metal, and masonry, the DEWALT Drill Bit Set (DW1361 21-Piece) handles everyday drilling tasks with HSS twist bits, spade bits, and a masonry bit -- the most cost-effective starter set: